|
Step 1: Covering the brick
Get a large clean brick,
not in the least broken or scaled off at the edges, and cover it all over with strong coarse tow linen, or thick cotton cloth,
sewed on tightly and smoothly with strong thread.
This is like wrapping a package. Place the brick in the middle of your coarse
cloth.

Bring up the sides and whip stitch the seam. You may wish to fold over one of
the rough edges to avoid fraying. The curved needle is useful here.
Bring up the ends. Turn in the top edge of the covering with the newly sewn seam
first. You may want to trim the edge even with the other edge of the brick if it is too long. Then turn in the side edges
over the top flap causing a fold at the corners. Stitch the side edges down to the turned down top edge.
Turn in the remaining edge. You may want to trim and/or fold over the point. Stitch
the edge down. Repeat on the other end.
Step 2: Making the pincushion
Then make a bag of thick
linen, allowing it to be two or three inches larger each way than the top of the brick. Stuff the bag as hard as possible
with bran or with clean wool; (not cotton, as it will prevent the pins from going in.)...Use a spoon for putting the bran
into the bag; and press it down as hard as possible.
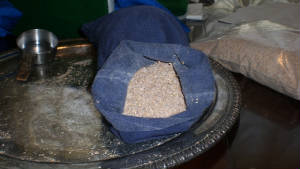
When the bag cannot hold any more, even by tight squeezing, sew up the open
end.
This does not have to be pretty.
It may be more practical to complete Step 4 before Step 3.
Step 3: Attach the pincushion to the brick
Fit the bag
evenly all round to the top of the brick, and sew it strongly to the coarse linen covering.
Again, this doesn't need to be pretty. Attach the bag to the side of the brick
with the seam. The curved needle is useful here as well.
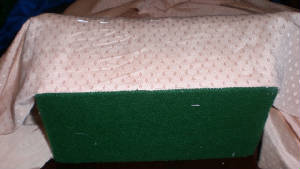
Step 4: Attach the bottom felt lining
Then sew a piece
of green baize on the bottom, where it sits on the table.
The felt should fit cleanly from edge to edge of the brick. If the brick edges
are uneven trim the felt to fit. Using a curved needle, sew the felt to the covering on the bottom of the brick.
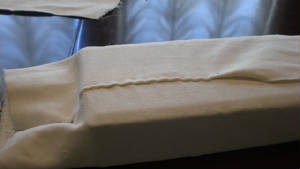
Step 5: Covering the pincushion
Afterwards cover the
whole pincushion (except the bottom) with thick strong silk, or damask, or some other substantial material.
Fold under one long edge of the covering fabric and lay the fold even with
the bottom of the brick. Attach the covering fabric to the brick by sewing, with small stitches, to the fabrics at the edge
of the brick. Try to go through the bottom felt, the fabric covering the brick and the outer covering fabric.
Smooth the outer fabric tight over the top of the brick to the other side. It may be
helpful to pin the fabric to the pin cushion as you smooth it to keep it taut.
Sew down the covering fabric to the other side using the same
process above.
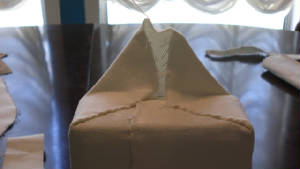
 Fold in the edges at the end of the brick, similar to how the ends were wrapped
around the brick. Be sure that the fold on the long edge is carried through to the end of the fabric. The fold on the ends
should be lined up with the edge of the ends of the brick. Attach the folded ends to the bottom of the brick as described
above for the long side.
Once both end flaps are sewn down,
bring down the fabric from the top, tucking under any loose fabric. Fold under the edge of the upper flap and pull the fabric
tight lining up the fold with the edge of the brick. Attach the upper flap at the bottom of the brick in the same manner outlined
above. If you wish, you may stitch down the edges of this upper flap as well to finish it off. Repeat the process with the
other end.
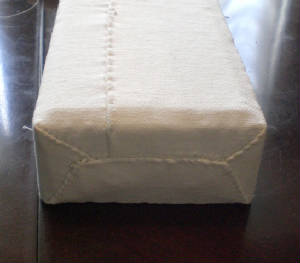
You can be creative
in how you finish off the ends.
It is best not to ornament it with bows, as your thread may catch round them
when you are sewing.
FINI
|


